Showing posts with label Baby Showers. Show all posts

Wednesday, July 22, 2015

Welcome Baby Party: Party Baking (2015)


I'm back today with one last post about the Welcome Baby Party - I can't help it, I love this stuff!
Today I'm sharing all the baking info, check it out:


Supplies

For the cake I used Betty Crocker cherry chip cake mix and pink cherry frosting.  I used Wilton sparkle gel in white and white candy sprinkles for the decorations.

For the cupcakes I used Pilsbury dark chocolate cake mix and frosting, with pink sprinkle candies for the top.


Icing

After covering the cake in the pretty pink cherry icing, I turned to my sparkle gel and sprinkles.  The white sparkle gel is really pretty as is, but I wanted this cake to be a bit more colorful. I decided to color the sparkle gel a bright pink.......


Adding Color

...so I added a bit of red food coloring to the sparkle gel.  Once colored I used a plastic sandwich bag to apply the icing in pretty swirls.

You can click here to read a former post where I discuss this technique.


Swirls

I added the swirls to the top of the cake first...


White Candy Sprinkles

...and then followed up with a light layer of sprinkles.


The Finished Cake

Because I wanted to keep with the pink and white party theme, I chose to use this white ceramic cake stand (instead of my usual glass cake stand).  

It looked great, but this stand doesn't have a cover.  I needed to somehow keep the cake fresh until the party without smudging the frosting.  I was worried that plastic wrap would ruin the icing, so I froze the cake before wrapping it up and quickly stuck it back in the freezer.  When it came time for the party, I made sure to remove the wrap before the cake thawed out.  It worked perfectly!


Chocolate Cupcakes

These were very simple to make; chocolate icing with a few pink candy sprinkles on top.

Want to see these cakes at the party?  Click here to see the party decor post.
And that's it, you finally have all the details for this party!

In case you missed anything:
You can click here to see the invitations.
Click here to see the candy bar favors.
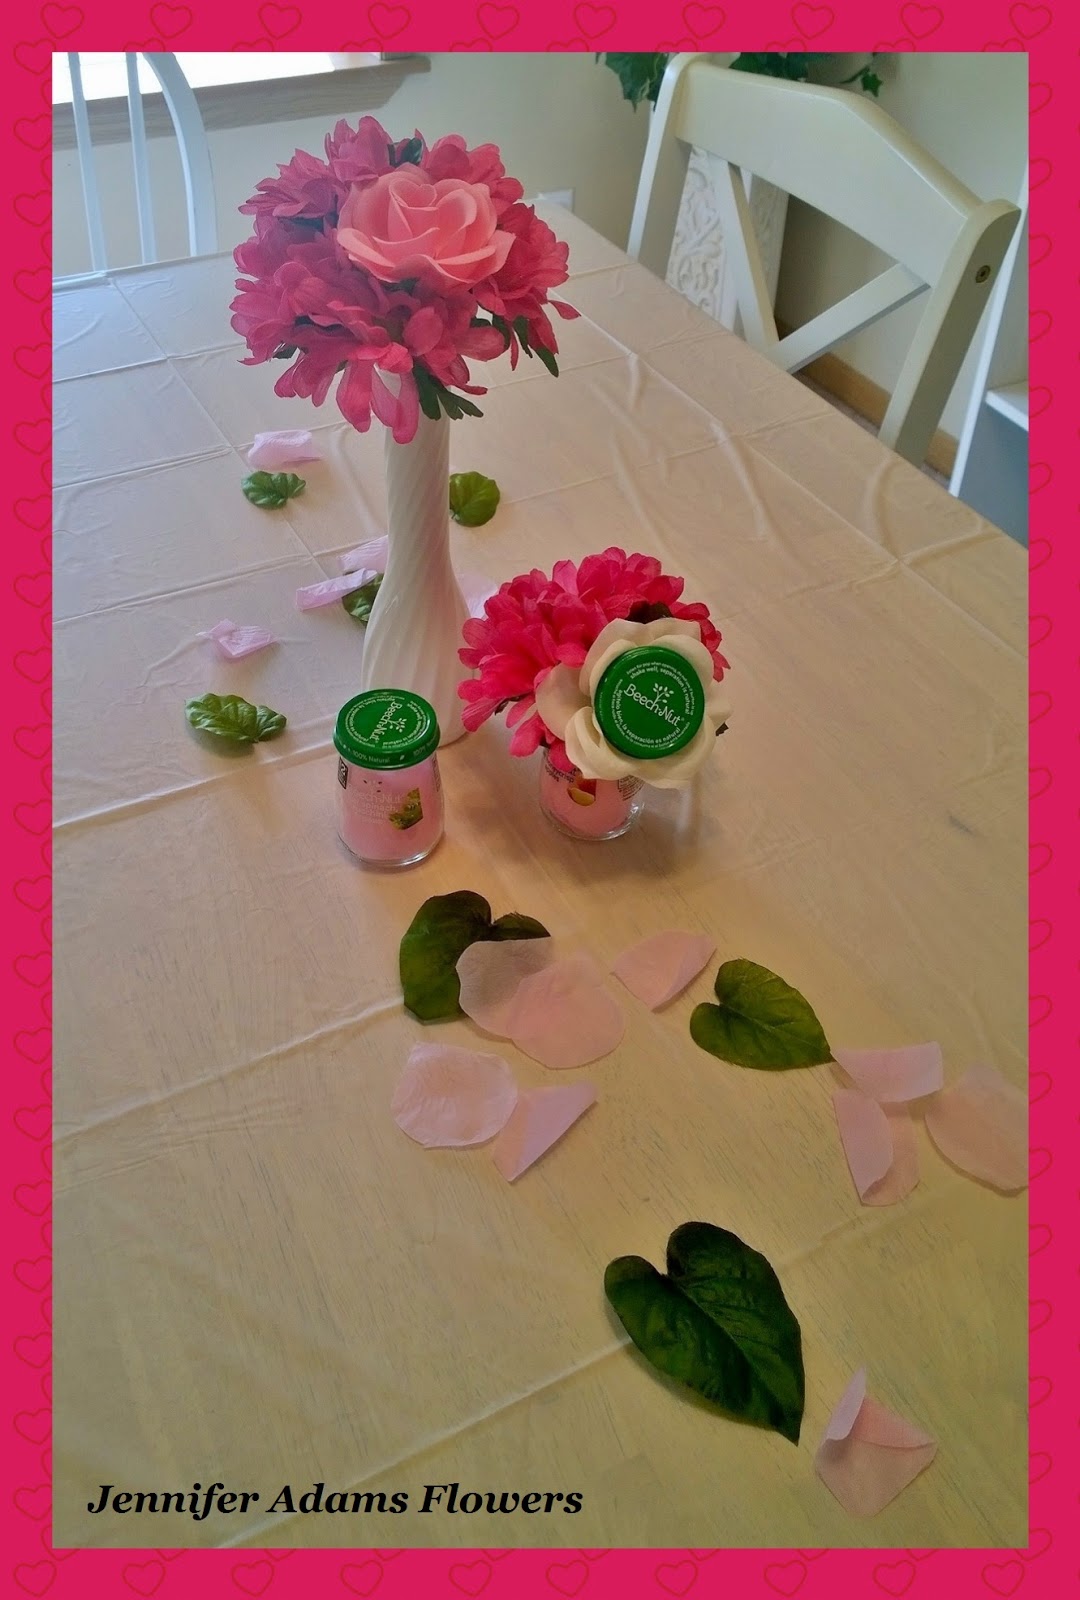
Or click here to read all about the flowers.

I hope you enjoyed the post, thanks for stopping by!

-Jennifer

© Jennifer Adams Flowers 2015

Wednesday, July 15, 2015

Welcome Baby Party: The Flowers (2015)


Remember the flowers from the Welcome Baby Party post?  Come with me today for a look behind the scenes at how I put everything together!


Materials

I started out with a few hot pink fabric daisies, light pink fabric rose petals.  For containers I used a couple of white vases and baby food jars that I saved from the Little Man.


Pretty White Vases

Both of these vases were treasure hunting finds from this summer.  Once I had settled upon a design theme for this party, I started looking for pretty glassware.

The vase on the left is white ceramic and was priced at $1.

The vase on the right is milk glass and was in a box that said 'FREE'...yep :D

Both of these vases went home with my sister to keep.  I think I'm going to look for a couple more though, to add to my own collection!


Baby Food Jars

You might remember these jars from this post last summer.  

I love these Beechnut jars, they are so cute!  When the Little Man was done with baby food I decided to keep a few in my candle cabinet.  Yes, I wanted them as keepsakes...but I also had a specific idea in my mind.  I kept seeing them filled with flowers for my sister's new baby.  I should point out that this was before any of us had any idea that a new baby would be coming..hee hee hee!

Fun Fact:  That's something that happens to me a lot, I get very clear visual images of future events.  I can't control it and they typically only involve people I am really close to.  (I actually dreamed my Husby's face and name in 7th grade, but that's another story!)  ...And no, I can't predict the lottery.  Believe me, I have tried!  :D :D :D

Ok, Moving on.....


Fabric Petals

These pink rose petals are from Dollar Tree and are only $1, of course!


Work

The first thing I did was to toss this big white sheet over my dining table.  We have had so much rain this summer, and this particular day was no different.  My poor little kiddos were starting to get a bit stir crazy, and I had to get these arrangements done.  So I threw a sheet on the table to make a wonderfully distracting tent.  They played underneath and I worked on top.  ...I also spent about half an hour picking goldfish crumbs out of the carpet afterwards, but everybody was happy!


Pink & White

A few clusters of pink daisies were very pretty in these white vases, but something was missing.


Finds from the stash.

I went through my supply bins to see what I could find.  I thought these pink and white roses would be the perfect addition to the flowers I was already using.


Much Better!

Adding just one pink rose to each vase gave the arrangements so much more dimension.  The roses also served to bring the pink color of the rose petals (not pictured here) up from the table top.  

(I planned on using the fabric rose petals as confetti during the party)

I thought it was important to point out that designers don't always have every detail worked out in advance.  I start with a general plan, but it's very common for me to add or change things here and there as I become inspired.  Don't be afraid to let the process unfold, even if you feel 'blocked'.  By jumping in and playing around with your materials, you may find yourself coming up with all sorts of ideas!


Tiny Bouquets

I wanted half of the baby food jars to be filled with tiny bouquets.  I quickly realized that such short stems were not going to stay put on their own, so I added a bit of florist's tape.

I also added one white rose to each arrangement, to play off the larger white vases containing pink daisies with one pink rose. That's another detail that came about as part of the work process, originally these jars were going to contain solid bouquets of the pink daisies.


Every jar needs a lid!

How was I going to add the lid to the arrangements?  The white roses ended up being the perfect spot to glue them on, the visual contrast was perfect!


A couple of completed jars.


Rose Petals

Remember how I said that I only added bouquets to half of the baby food jars?  The remaining jars I filled with fabric rose petals.  I just thought it was a cute idea :)


Continue scrolling for more pictures of the completed arrangements--


Those were the flowers from the party, I hope you enjoyed!

In case you missed anything:
You can click here to see the party decor,
  here to see the candy bar favors
or here to see the invitations.

Thanks for stopping by!
-Jennifer

© Jennifer Adams Flowers 2015

Friday, July 10, 2015

Welcome Baby Party: Candy Bar Favors (2015)

Remember the candy bar favors from the welcome baby party?
I'm back today sharing how easy they were to create.  Take a look!


Supplies

All you need for these super easy favors are a few Hershey's candy bars and permanent markers in the colors of your choice.  I used the mini candy bars for this project as I had a specific bowl in mind that I wanted to fill them with, but any size candy bar will do.

Tip:  Try using more than one shade of the color that you use.  You can see in the photo that I chose different shades of pinks.  By using two shades, the favors better matched the overall decor and added visual interest to the finished favor bowl.  


Little Helper

This is a great project to enlist the help of the kiddos with, my Baby Girl did a great job!


...She also enjoyed a few treats ;)


Finished Favors

You can see from the photo that we ended up with both SHE and HER for our favors.  Baby Girl was working along when oops, she grabbed a new candy bar and accidentally colored in the H.  But she said, "It's ok Mommy!  See, I'll just make it say HER instead of SHE".  Baby Girl figured out that solution all by herself!  Not only was I very proud of her, but I loved the way it looked too!

I think it's important to remember not to get upset when 'accidents' happen in design.  Sometimes they can help you come up with even better ideas!

You can click here to see these favors on display at the party.
(You can click here to see these favors in the blue HE version for the Little Man's Baby Lunch.)
...And in case you missed the invitations for this party, click  here.

 I'll post next week with bakery and floral details, right now I'm going to get to work on somebody's Frozen themed birthday invitations...;) ;) ;)

Thanks for stopping by!
-Jennifer

© Jennifer Adams Flowers 2015

Tuesday, July 7, 2015

Welcome Baby Party: The Decor (2015)


A little over a week ago I was lucky to host a welcome baby party for my Sister and newest Niece.  I chose a simple but elegant design theme; blending pink, white and several glass pieces.

Take a look at how things came together:


Glassware

The first thing I did to start decorating was to gather my glassware.  Not only is it good to get organized, but seeing decor items together really helps to inspire me!

Tip:  Don't be afraid to mix and match your glassware.  You can see here that while no two items are from a matched set, they blend together nicely.  I recommend sticking to just two or three types (such as the white and clear used here) to keep things from looking too random.


Plates & Napkins

I wanted this party to be more elegant, so I pulled out my glass plates (as opposed to my usual paper products).  Glassware really helps to turn your decor up a few notches on the fancy scale ;)

I did however decide to go with paper napkins, as I wanted that pop of color.

You can click here to read more about my glass table settings.


Milk Glass Punch Bowl

Keeping with the pink and white elegant theme, I also pulled out my punch bowl.  Baby Girl and my older Niece enjoyed drinking from these 'princess' cups!

You can click here to read about this beautiful set that once belonged to my Great Grandmother in my very first Treasure Hunting post.  The post also details how my Granny got me started :)


*****
Now, for a few floral photos:


For the flowers I used pink daisies, pink rose petals and a few pink & white roses.  Some of the arrangements were displayed in white vases, while others were tucked into baby food jars.  I'll be posting soon with all of the floral details!

Side Note:  I used plastic table coverings, because that is what I had available.  But if you want to make a gathering really elegant, fabric is the way to go!


Cherry Chip Cake

Bakery post coming soon!


Chocolate Cupcakes

A few opened napkins and stray flowers helped to tie the overall design together.


 Candy Bar Favors

These candy bar favors were really simple to make. (Favor post coming soon!)
A few of the faux pink rose petals tucked into the bowl helped to soften the look.

And that was our welcome baby party, thanks for stopping by!

-Jennifer

© Jennifer Adams Flowers 2015

Tuesday, June 30, 2015

Welcome Baby Party: The Invitations (2015)

I have been working lately to host a welcome baby party for my sister and newest niece who are staying in town for a couple of weeks. Since my sister lives a few hours away (and she's all newborn exhausted) we thought it would be better to wait until she got here to set the date for her party.  That way we could make sure to plan it when my sister was (hopefully) a bit more rested.

I took a few photos of my niece on a Monday, made the invitations that night and planned the party for the following Saturday.  It was a whirlwind, but well worth it!

Usually I like to construct paper invitations, but there was no time for that (or the time it would take to mail them).  I knew I needed to send the invites out electronically but still wanted them to be cute, so I turned to MyScrapNook to quickly create adorable invitations.


 Pretty in Pink

The theme of the party included daisies and lots of pink.  when creating this invite, I first chose a pink polka-dot background, then layered the white 'sheet' on top.  This gave me a nice clean space to add the text and a photo of Baby D (not included here).  I added a a few pink daisies at the corners, then popped in the text.  ....Not too bad for 12:30 on a Monday night, huh?  :D

 In case you can't see it clearly, here is the text:

We are tickled pink & excited to say
That baby ____ has made our day!

Join us for a 'meet & eat'
(Cake & punch to be served)

***Don't forget to add the date, time, ect!


Free Printable

I included this blank template in case anyone wanted to use the same theme.  Just right click on the image and save to your computer.  You can print out the image as it is here, add text, use it electronically...the possibilities are endless!

I hope you enjoyed, thanks for stopping by!

-Jennifer

© Jennifer Adams Flowers 2015

Tuesday, January 13, 2015

From the Archives: Baby Lunch! (2015)

Since I have always been a planner, I made sure that all the baby equipment we acquired for Baby Girl was in a neutral color palate.  That meant other than diapers and boy clothing, we had everything we needed for a second baby.

To throw a baby shower when we didn't need gifts seemed tacky, but I still wanted to celebrate the new baby.  I also wanted to have photos so that his second-born baby book would be as nice as the first-born baby book.  And I wanted the opportunity to do something special with my Baby Girl, something that would help her prepare her little heart and mind for the new arrival ;)

So we decided to host what we called the 'Welcome Baby Lunch'.  Baby Girl and I worked together looking at Pinterest ideas, planning a menu and decorating.  It was a lot of fun!  Our theme was snowflakes, with baby items added in here and there.

We kept the party very small by limiting the guest list to the two Grandma's, one Great-Grandma, my Sister and one Sister-in-Law.  We also noted on the invitation that no gifts were needed, we just wanted to celebrate!

Note:  I took these photos before I started blogging, so the intent was to capture the emotions/ memories of the day as opposed to the 'how-to'.  You can see the difference as to what I usually post, but I think you should still be able to get a good feel for the overall design.  Enjoy!


Dining Table

I used a white table cloth and layered on white holiday lights.  To make the lights softer looking, I tied on many strips of tulle fabric (thank you Pinterest!)

The next step was to add cylinder vases that were filled about an inch high with faux snow.  On top of the snow I placed a single baby bottle.

Then I added in a few glass jars filled with creamy white crushed velvet poinsettias.  I wanted some sort of floral decoration, but I didn't want the table to look 'flowery'.  I also wanted something that could be recycled into my yearly winter decor.  The poinsettias worked perfectly.

I wanted candle light as well and used vanilla scented votive candles in my vintage juice glasses.  These pretty glasses were a gift from my Husby, who found them while mushroom hunting of all places! ....Something about a farm, a house being torn down and a man with a tractor burying trash.  Husby saw the glassware and asked if he could have them, then brought them home to me.  Yay!

Want to see how I made 'snow balls' with faux snow?  Check out my Winter Decor post here.  There you will also see how I currently use some of the left over white poinsettias.

*This was not a dark candle-lit party, I just had the lights off for the scrapbook photos :) 


Another view of the dining table.


Table Scatter

I used miniature plastic snowflakes as confetti throughout the party.  I found these in the holiday section of Wal-Mart before Christmas.  I think they were around $1.

(I saved all of the snowflakes to use as embellishments for the coordinating scrap book pages.  Hello glue gun!)

I also added in a few pacifiers for the cuteness.  I didn't have to buy these either, they were all left over (still brand new) from Baby Girl.  She would never take a pacifier, so I had a bunch in storage.  Guess what?  The Little Man would never use one either.  At least I used them for something ;)

You can't see from these pictures, but in addition to the table scatter there was a miniature white snowflake ornament at each place setting.  I found the ornaments at Wal-Mart, and each guest got to take theirs home.  I also made sure to have enough left over so that Baby Girl and I each have one as well.  Now when we decorate our Christmas tree, we remember the party that we hosted together :)


Dessert Table

Since we were eating in the dining room, I used the kitchen table as a dessert station. 

A white table cloth served as a snowy backdrop for the yummy treats.  I used blue snowflakes as confetti to break up the sea of white and layered the napkins.  I always layer out my napkins this way, even if they are all the same color.  It looks so much prettier and is also a great space filler.  Full displays are always much more appealing!


Hershey's Chocolate

I saw this cute idea on Pinterest.  Color in specific letters to end up with chocolate bars that spell out 'he' or 'she'.

I used two different colored Sharpies for the lettering and nestled the chocolate bars into a milk glass pedestal bowl.  An aqua colored napkin helped to provide contrast so the tiny snowflake ornaments could pop.


Snowflake Cake

I cannot remember what kind of cake this is!

I do remember that It is a double layer with the bottom layer being round and the top is snowflake shaped.  I also remember that when I iced the cake it didn't look so much like a snowflake anymore :D

I used miniature white marshmallows to help define the snowflake a little bit better and added some white pearly sprinkles too.  To achieve the snowflake shape on top, I used a cookie cutter as a stencil for the sprinkles.

I had absolutely no intentions of using marshmallows for this cake, but it ended up turning out really cute.  That's the way it is in design, creativity and flexibility are keys to success!

....It's ok to have a bit of a freak out though, I was rummaging through every cupboard trying to figure out how to fix that cake! :D :D :D


Cupcakes!

These cupcakes were baked with Devil's Food mix and iced with chocolate frosting.  On top I sprinkled chopped up Andes mints.....They were super yummy, a total pregnant ladies dream! 

I baked the cupcakes in white silicone wrappers and displayed them on my three tiered glass cupcake stand.  I also sprinkled a bit of white snowflake confetti here and there on the glass for added visual interest.


It was such a fun party, and I could go on forever,  but right now I need to get pack to planning a First birthday party for a certain Little Man - birthday posts coming soon! In the meantime, if you would also like to read about my shower for Baby Girl, you can click  here.

Happy designing and thanks for stopping by!

-Jennifer

© Jennifer Adams Flowers 2014

Wednesday, June 11, 2014

From the Archives: Baby Shower Decor 2014

About five years ago I had a beautiful baby shower.  Due in the summer with Baby Girl, I decided upon the theme of 'Rubber Ducks at a Luau'......Yep, I decorated my own baby shower! 

The top photo has all of the pink plates, cups, napkins and flatware.  I nestled them inside of a large inflatable baby bathtub that was shaped like a duck.  You can't see from the photo, but the duck was wearing a blue Hawaiian lei.

I had rubber duckies everywhere!  The bottom photo shows a few that were sitting in front of the table supplies.  These were my favorite because they were summer themed and fit right in with the party.


Here you can see some of the table decorations.  The long tables (where we ate) were covered in bright green table cloths.  I took apart a few Hawaiian leis and used the flowers as table scatter.  
 I also put some into baby bottles and had them on the table tops with tropical scented candles and more ducks.  On the side tables I arranged ducks inside of a few glass vases.


My Granny was still alive at this time and she found the large duck (photo on the left) at a yard sale.  I loved it and used it to tie balloons to at the gift table.  

The right side of this photo shows some of the wall decor.  I made up some simple drawings on brightly colored scrap booking paper and cut them out.  It was an easy way to add color to the walls and coordinate the design between the eating and sitting areas of the venue.


Here you can see the diapers for the door prize game (one was 'dirty') and the game gift bags on the top.  On the bottom is the table with the guest favors (small candles) and goody bags for the children that attended.

I wrapped one of the Hawaiian flowers into the candles with tulle to make them 'tropical' and scattered more on the table top.  All of the gift bags were brightly colored, and I cut out  smaller duck shapes for the children's bags.


Strawberry cake, made by me.


Lemon raspberry cake, made by me.

Both of the cakes were displayed on simple glass cake stands.  A bit of curling ribbon and a pink pacifier topped them off nicely.


I can't take credit for these treats, but had to share because of how well they added to the overall style of the party.  The amazing chocolate cupcakes with strawberries on top were a treat from my Mother-in-Law.  My Aunt brought the adorable watermelon turned baby carriage!


Even many of the gifts came with the duck theme as well. You gotta love it when the guests participate in the decor!

While a few items were purchased for the party design (like the gift bags and Hawaiian leis) many items were simply reused.  The ducks and baby bottles are two example of items that while purchased for the baby, could also easily be used as inexpensive decor.  Add in items like colorful table coverings or scrap book paper and you can easily design a beautiful event while keeping costs down.

Hope you enjoyed the post, thanks for stopping by!

-Jennifer

© Jennifer Adams Flowers 2014